Wednesday, July 20, 2016

First things first...Making a design wall

  In a studio space, first things first.  Get your equipment moved in where it works for you.  Set up your supporting things (quilt stash fabrics, paints, inks, pencils, pens, rulers, light table, ironing board, shelving for your resource and reference area, threads, threads, yarns, patterns, etc.).  Now for me, the absolute first thing I need before I really want to create is that I need a design wall.  These spaces are invaluable for laying out ideas, piecing parts, mulling over if I am achieving a desired effect.  So here's how you make one...easy-peasy:

Materials:

  • flannel fabric, 44-45" or wider if available OR a flannel flat bedsheet (neutral color)
  • Sewing machine to sew a seam(s)
  • thread
  • a stapler or staple gun with staples
  • a stool or chair to stand in
Calucate the available space you have on the wall.  Try to get as large as possible.  Now calculate your yardage needed.  Note:  if you width is larger than 44-45" fabric or 54" fabric then you will need to sew widths together.  So double your length amount in calculating for the amount of fabric needed.  Here my wall space was 81" by 96".  I'm making my design wall space 78" by 74".  It doesn't really help me if it's taller than I can reach since I'm banned from ladder usage (due to my clumsiness recently) so go as high on the wall as you can comfortably reach.  The bottom edge can go to the baseboard or just above it.  My's about 4-6" above the top of the baseboard.  When preparing your flannel fabric, I tear the selvages OFF, because when you sew a seam with the selvages in place, the seam will bow and not lay flat.  So tear them off.  Next if you have to join pieces together, as I did, fold your fabric in half  from top to bottom.  Mark the center, snip a 1/2"cut and tear in half.  Now sew those two halves together side by side as I've done here.  Now use your stapler to attach to the wall.  Start with the middle top and work outwards on both sides keeping the fabric taut.  At some point after I have a few staples on the top I tack one on the center bottom, then start on the sides and work my way around until the whole thing is attached to the wall.  Some people like to cover a piece of insulation board with flannel since you could pin through it.  I have liked the idea of a felt surface ever since kindergarten when the teacher would tell stories using a portable felt board.  I don't necessarily want to pin things, although you can slip a pin to sorta fasten things temporarily, I just want to place things up there on my design wall and see if this goes with that, move things around...for me... i do so much moving and adjusting...that pins would get in the way.  I just keep it simple.  It works great for me.  Have fun.

An easy way to do all the above is to just staple a flannel flat bedsheet to the wall!!!  Whatever works and you can get your hands on easily... fabric or a sheet.  Point is you will have a great design wall . Happy dance:-)!!


 TA DA!!!!!!!!!!

A Life lived. Living life.

Hi.  Yes, it's been a while since I've written.  Sorry about that.  My sister passed away.  She had a turn in January ... needed extra treatment and though that was super successful, the cancer attacked a different part of her body that wasn't as strong.  "We got out-flanked", as my brother-in-law puts it.  A life beautifully lived.  I miss her. :-/ 

As to the point above, I'm of course leaving a boatload out.  And that's the way it has to because that's what I can handle right now.  And with that said...

Now here's the thing, you have to go on.  An experience like that changes you in ways I never imagined.  And my creative pursuits have been on hold for some months, obviously, and now it's my turn to keep living life.  A not so easy challenge at first, but as the quiet sets in, the tears fell and fall, the stillness without her, the no I can't call you about this or hey honey what should i do about that, and regardless of anything (and everything for that matter), I'm still in this realm called earth, still breathing, the grass is still growing, my tummy is still growling cause it's lunch time, the sun is still shining and the world is circling around the sun yet another day.  And until that changes, which it's not as of yet, it points to the fact that it's my job to live life, whatever that looks like.  My hopes are to be as geniune as I can with who I am as I pick up my different pursuits--stretch beyond where I've been, explore new veins of interest and expand beloved ones.  It's definitely a 'you better live while you can cause this is your life and the only one that's going to make it anything is you' kind of feeling about it.  I feel charged by her.  What I mean is, not that she is charging me to do something, but this whole experience, her life beautifully lived has affected me and I want that to be VERY APPARENT in how I live life now.  And I'm becoming ok with that.  

Additionally during this time period, we had a happier time... a family member got married, so I got upgraded from my tiny but loved little sewing room to a sizable sewing studio with a wonderful storage closet and a huge design wall.  That was definitely something I didn't see coming..but for sure am not going to turn it down once offered!!  SO here we go.  Back to Living Life.


Sunday, January 10, 2016

Dear Jane Quilt Club (DJQC)

previous months work....yikes...yes a lot of tiny work


Dear Jane Quilt Club

I belong to this Dear Jane Quilt Club which if you don't know much about Dear Jane Quilts, google it.... cause basically it's a 200+ block quilt all of which are 4 1/2 inches square with a triangle border made in 1863 by Jane A. Stickle.  The club will have been meeting for four years when it's all said and done with a quilt show at the end.  Each month we get worksheets for 4 to 5 blocks to work on for that month.  I joined when the club was about a year and a half into it... so needless to say I have had some catching up to do!
This past week's progress
:

New Year, new experiment!

Hope you all had a nice beginning to your new year.  I had a houseful over the break and somewhere in the midst of all the hub-bub an epiphany of how to handle my creative life came to me.  And so I begin to explain my idea.

I hit this wall constantly with my creative life.  First, I have a lot of creative pursuits. Second, the focus on one thing at a time, although I get the gist of it, scheduling a month, a few weeks, whatever for just that sole intent is too boring.  Third, there's my old life and schedule which didn't allow for as much creative time as I have now.  Fourth, the make a schedule route...just looking at an hour by hour planner can send me over the edge!  And there's the "oh, am I or am I not in the mood to do said craft".  Ugh.  My head hits the door of frustration a few times, I sink to despair and nothing much gets done, while I'm waiting for that inspiration to strike.  Not a fantastic place to be for sure. Then to add to it all, some around me do not function like me, they are more regimented, enjoy their work, don't understand why I can't be/do it like them.  OK, well, let's see...what can I glean from their mode of operation?  They are good at scheduling.  So am I, just not related to my creative pursuits (or so it seemed).  They look at things from a math point of view.  OK, could use that. And so I started adjusting my approach to my problem.  People aren't going to change that much.  If they haven't given me the answer in 30 plus years, or understood how I work, I doubt that will change much.  And it's not somebody else's problem anyway.  But I am not too proud in some ways, to know when I'm stuck to ask for help....it's just the help wasn't in a way that profited me.  

But let's take the scheduling aspect.  Is there a way to look at this differently that won't send me over the edge?  I started to think, what info or data do I need in order to get my head around some kind of scheduling that I can handle?  First, I made a graph-like spreadsheet and labeled my interests that keep popping up in my head wanting attention.  To me they are almost like kids, each going: "look at me", "take care of me", "I need your time".  So ignoring them was out of the question.  Next, was attaching some percentage of my time that each needed and that I needed to suffice as oxygen to me...in other words, how much oxygen/time do I need to spend on each category or several categories that will replenish me, keep these kids happy, keep my creative juices reaching in a positive direction? (I must make a note here:  OxYGEn in my book is what i have to have to live, feel refreshed, be me.  So excluding creativity and beauty and color in my life is a sure fire way to get depressed quick!)

Here's the spreadsheet, notice that some of the columns are longer than others.  Also, what occurred to me was why not schedule things like college courses where you meet so many times a week for this course or that.  Here I substituted creative pursuits for courses.  This weekly schedule does not denote hours spent on those activities, only that I get to that pursuit sometime that day.  (Btw:  if you are short on wall space as I am in my residence with a ton of windows, fold part of the spreadsheet as I did here and tape on the back of a door.)  And the spreadsheet is not a checklist for me; it's an ongoing list of pursuits and projects.  Scratching them off, although, that's good, for me it's working on the projects.  I work on a project, as long as it wants to be worked on.  A lot get finished, some are in stages but I try to keep moving on the next exciting one that intrigues me, excites me, that ideas are popping like popcorn and making me happy, the colors or shapes have a promising puzzle to work out, there's a new skill to learn...whatever...you get the point.

Looking up at the top photo, I realized my priorities had shifted.  I had a lot of quilt ideas, both art quilts and simpler quick projects, I had a LOT of books of various subjects...which I really liked that new trend in my life--research, new topics, fun reads, the gamut, and then there were those little crafting projects that never seem to be gotten to and those out of season ones as well.  OK, some of my categories are not all year long.  I scrapbook in the winter and don't in the summer.  I garden in the spring and some in the summer and fall and don't in the winter.  Trends were emerging :-)  Happy dance!!! We're getting somewhere.  That college course schedule  popped into my head and my response was, "I can handle that".  Plus, the idea of a college approach sounded completely interesting to me.  It implied a deeper focus on projects, research, problem solving and the time necessary to do just that...YEA things I love to do!!! 

I started Thursday of this week.  Followed through on Friday.  OK, capital letters may start falling off here.... just letting you know.  Turned out friday's quilting time got really involved to the point that I didn't get to blogging or crafting that day.  Skipped classes?  So here I am blogging on sunday.  Making up a missed class time.?. Looks that way. :-)

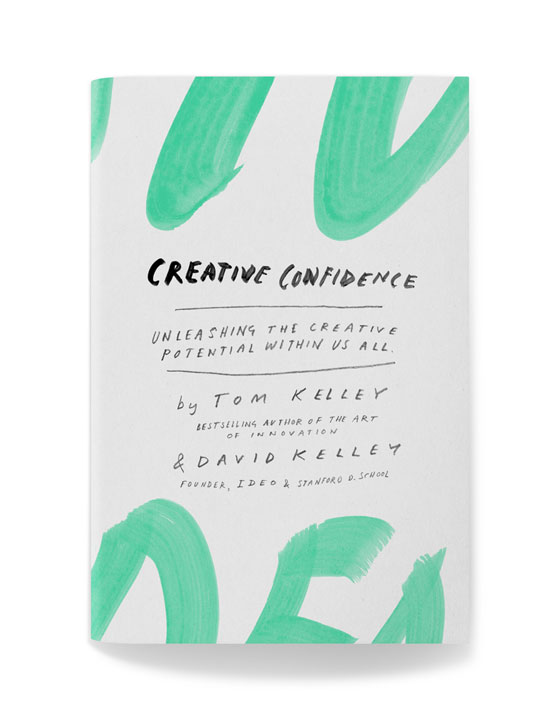
Need to mention here two books I'm reading that are very helpful on the subject matter above:  Creative Confidence, Unleashing The Creative Potential Within Us All by Tom and David Kelley.  Super interesting book, look at pages 115 to 122 ...very reaffirming for me today and related to what I wrote above.  Also, Manage Your Day to Day: Build Your Routine, Find Your Focus &Sharpen Your Creative Mind, by Joycelyn K. Glei.  I'm up to page 34 on Jocelyn Glei's book.  

Image result for manage your day to day jocelyn k glei pdf